
This post may contain affiliate links. For more on this please see the disclosure
*DON’T FORGET* Join our NEW Score The Hot Deals Group for HOT Deals, FREEBIES, Giveaways and more!
Painted Pumpkins – Should You Try Them Too?
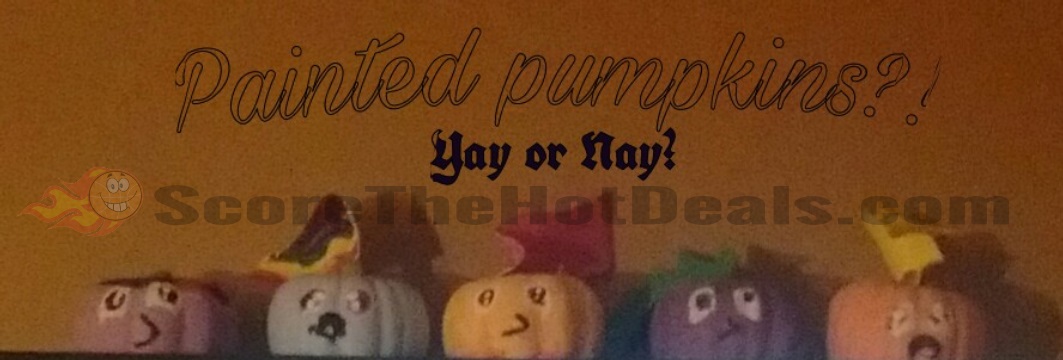
Okay, so you’ve seen photos floating around of painted pumpkins…but are they right for you? Check out the pros and cons as well as a super easy (and budget friendly) idea below!
Spike The Dragon
Pros:
- Pumpkins can be pricey! Painted pumpkins last way longer than carved pumpkins! How long? Last year we had them indoors for almost the entire month before they started to get mushy and rot.
- More design flexibility! Paint patterns, use color and let your imagination run wild without wondering if you are choosing a carvable pattern.
- Basically no skill needed! If you know how to hold a paint brush, you are free to create!
- Great for kids and large groups! No sharp objects and simplicity makes painted pumpkins a fun activity for any age!
- No pumpkin innards! Not on your hands, not on your work surface, not on the floor…you get the point!
Cons:
- No pumpkin seeds to cook and eat.
- Like jack-o’-lanterns? No carving means you can’t light it up when you are done to see your masterpiece.
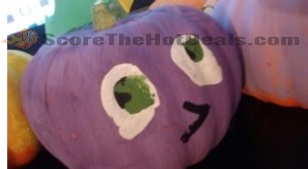
Twilight Sparkle
Ideas:
So, we have done painted pumpkins for a few years now because they are just better with kids and our kids don’t like pumpkin seeds and also hate the slimy pumpkin guts and they are too little to use carving tools. Last year our theme was Mickey Mouse Friends tsum tsums. This year we chose My Little Pony friends. Any theme (or non theme) works and is fun! So what did we learn that we can share to make it more fun for you?
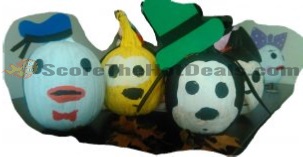
Tsum Tsum Pumpkins
- Any size pumpkin works! If you want a super budget friendly option purchase fake pumpkins and redecorate them for years to come! This year our Dollar Tree store had foam carvable pumpkins that worked very well for us!
- You can use many types of paint, but acrylic is our favorite. I bought a large set a few years ago and it was a great investment!
- If you will be keeping them outdoors you may want to spray them with a clear coat to help them stand up to the elements better, but this is optional.
- Don’t worry about perfection. It is easy to get caught up in trying to create the perfect decorations, but (and this is especially important if doing this with kids) just have fun and go with the flow!
- Craft foam and other small items make great additions to your pumpkins! We used hot glue to hold them on, but this will work best indoors with fake pumpkins. We lost a few pieces over time when they were applied to real pumpkins.
- Paint carved pumpkins! If you love carving pumpkins, but want younger kids to be able to participate or just want to add a little extra flair then by all means do both! There really are no rules when it comes to Halloween!
- Painted pumpkins (especially fake ones) will last for a good month, so do them much earlier than carved pumpkins and make them a cheap part of your fall decor!
DIY:
In case if you still aren’t convinced here is how to paint simple pumpkin characters from someone who still draws using stick figures!
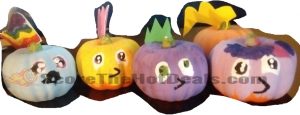
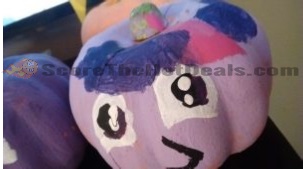
My Little Pony Pumpkins
Step 1. Paint a base coat with your color of choice (or don’t no one is judging)
Step 2. Paint eyes (bulging, squinting, lopsided…it really doesn’t matter)
Step 3. Add a mouth and/or nose. Even just a straight line, circle or squiggle works here.
Step 4. Add some pazaaz! Grab some craft foam or whatever you have lying around and glue it on, or tape it or throw it on top…heck just skip this step all together if you want who cares as long as you had fun!
